In this How-To article, I will cover how we could make a button in Dynamics 365 using Ribbon Workbench. The button will be located in the main grid of the contact entity and will appear when you select multiple records. When no records are selected, the button is hidden.
Business case
As a salesperson for a company selling phone services subscriptions I everyday work through a list of contacts in CRM. When a person is contacted I either mark the contact as contacted or as a customer based on if they bought a subscription or not. Sometimes I call 10-20 contacts before we start to mark them as contacted, so instead of navigating to each record to mark them individually, we want to select multiple records and simply mark them as “Contacted” or “Customer”.
Let’s create the solution!
First, we will start by creating a new solution with the entities we need. This is based on which entity you want the button to be accessed from.
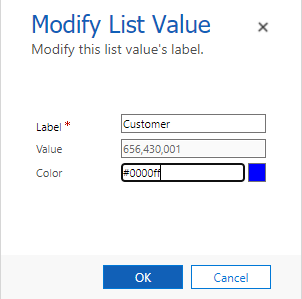
Then I will take some notes. We want the field name on the contact that we want to change or set with the button, in my case, it will be the status reason. And then I have created a couple of values for the active state.
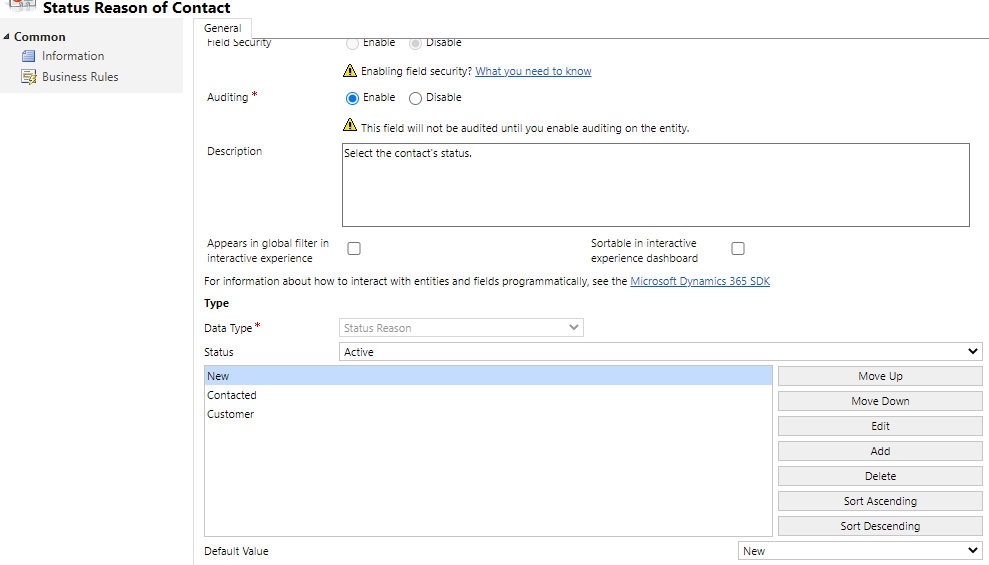
I will also take into my notes, the values of the different statuses.
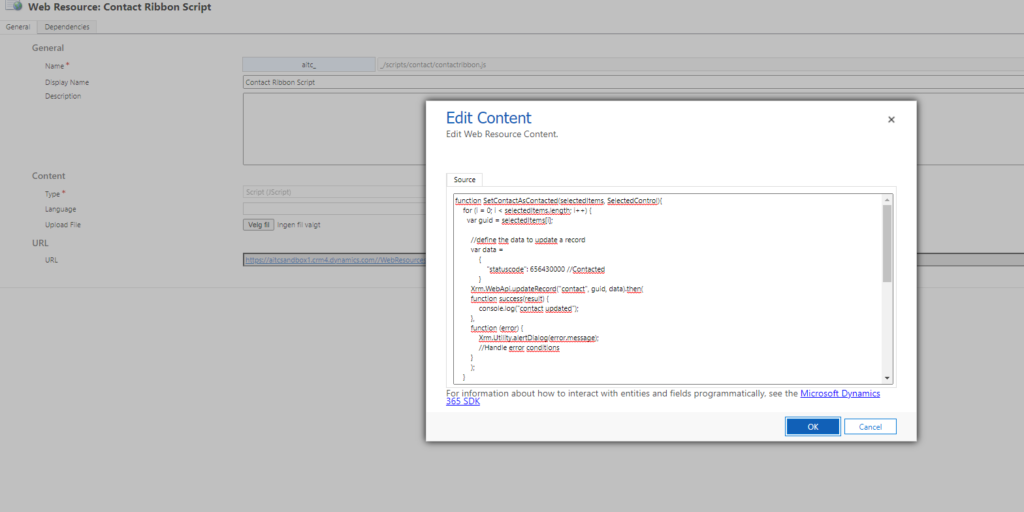
Now that we have the field name and the values of the different choices (status reason). We will continue to create a Javascript function to set the values.
function SetContactAsContacted(selectedItems, SelectedControl){
    for (i = 0; i< selectedItems.length; i++) {
      var guid = selectedItems[i];

        //define the data to update a record
        var data =
            {
                "statuscode": 656430000 //Contacted
            }
        Xrm.WebApi.updateRecord("contact", guid, data).then(
        function success(result) {
            console.log("contact updated");
        },
        function (error) {
            Xrm.Utility.alertDialog(error.message);
            //Handle error conditions
        }
        );
    }
   setTimeout(function (){refreshWindow(SelectedControl);},500);
}
function SetContactAsCostumer(selectedItems, SelectedControl){
    for (i = 0; i< selectedItems.length; i++) {
      var guid = selectedItems[i];

        //define the data to update a record
        var data =
            {
                "statuscode": 656430001 //Customer
            }
        Xrm.WebApi.updateRecord("contact", guid, data).then(
        function success(result) {
            console.log("contact updated");
        },
        function (error) {
            Xrm.Utility.alertDialog(error.message);
            //Handle error conditions
        }
        );
    }
   setTimeout(function (){refreshWindow(SelectedControl);},500);
}
In the Javascript above we have a function that will change the status of the records to either contacted or customer. Now we want to call one of these functions from a button/ribbon in Dynamics 365. But first, let’s create a web resource and upload the code snippet we created.
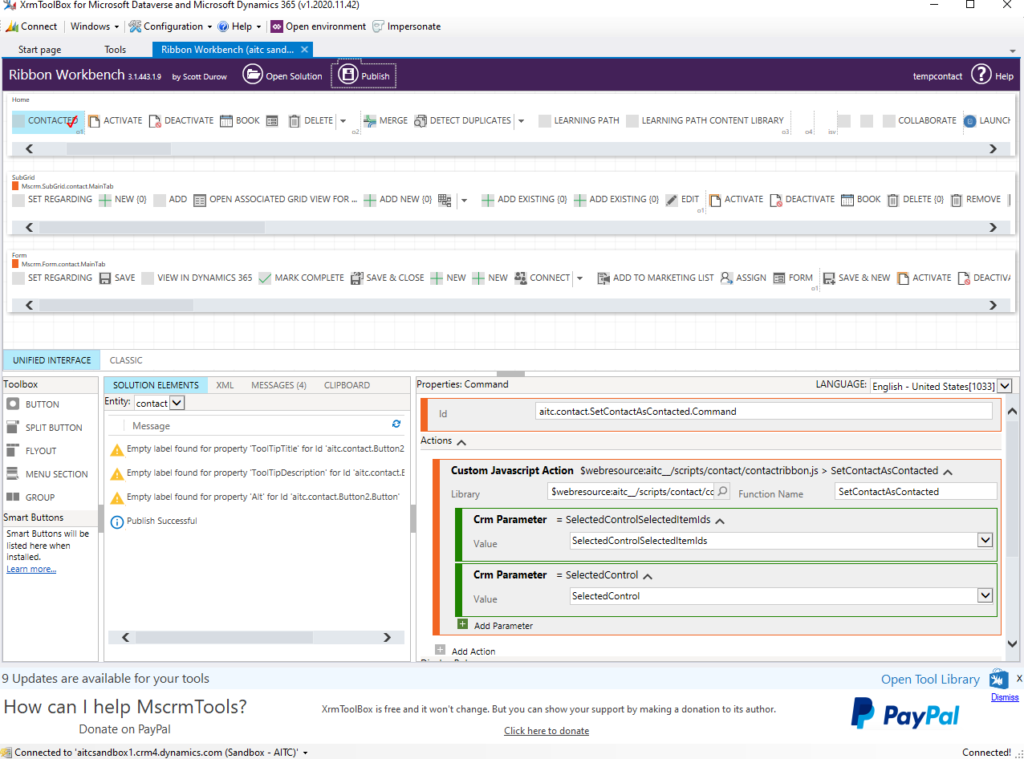
Next step is to create the button, we will open XrmToolBox and then install Ribbon Workbench.
When we’re connected to our environment, we want to choose our solution. Then you’ll probably have the same window visible as me.

Now I will create a button, and place it under Mscrm.HomepageGrid.contact.MainTab
Find a proper label for it and create a command related to the button.
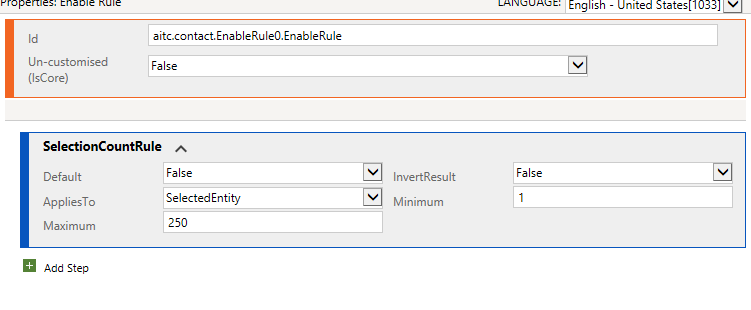
Create an “Enable Rule” and connect it to the command. This enable rule makes the button appear when 1 or up to 250 records is selected. The reason why I made a maximum of 250 is that my view isn’t bigger than 250 records.
Now, lets create another button to set the records as “Customers”.
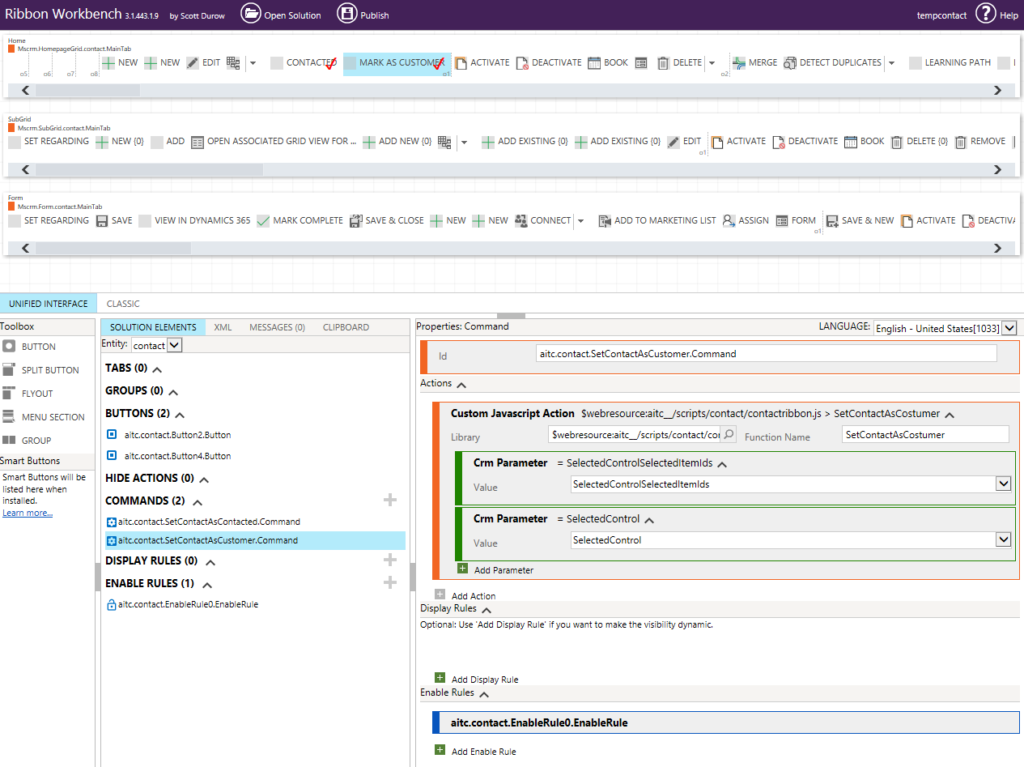
For this button we will create similar command just calling the other function we wrote. And for the enable rule we could reuse the one we created for the first button.
Remember to use the command on your button (I forgot this when writing this blog post, and refreshed CRM 10 times before realizing it)
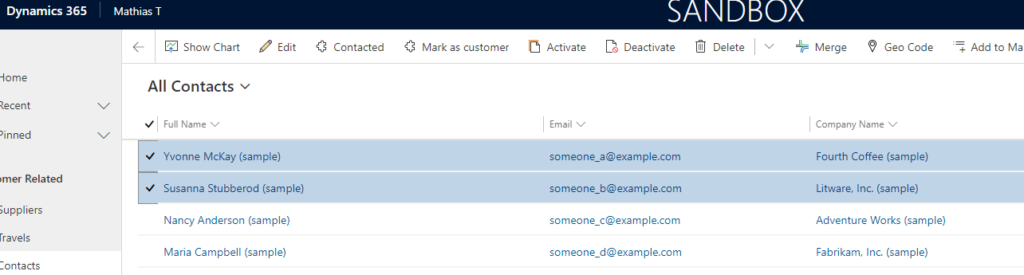
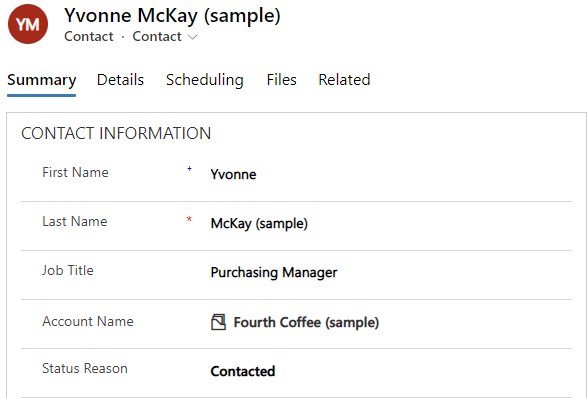
Finish by clicking “Publish” and mark a couple of contact records in CRM and see the buttons appear. Click the button, and navigate to your record to verify your field getting updated. (Or in my case, status reason/status code).
Thanks for reading this blog post! Next up I’m planning to write a post on how we could modify this functionality even further. This could be:
– Adding a progress indicator while records are getting updated (Helpful when updating multiple records and to determine when the records actually are updated)
– Adding an icon to the button, and where to find icons!
– Adding functionality that creates a customer’s record when a contact is marked as “Customer”.
Please comment or send me a message if you have any wishes for next “How-To” 🙂
Resources I used during this “How-To”
https://www.xrmtoolbox.com/plugins/RibbonWorkbench2016/
https://www.develop1.net/public/rwb/ribbonworkbench.aspx
When I write JavaScripts I personally use Brackets as my text editor.